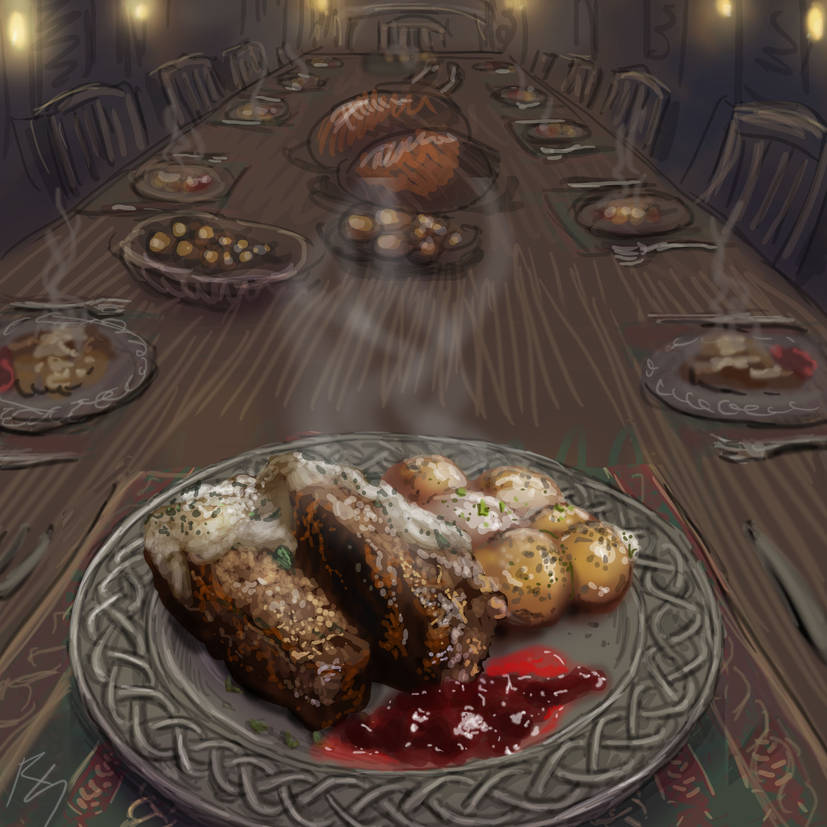
Vrykul Meatloaf
The recipe in question here was very similar to one done for a previous recipe article, but that was under a different writer. Then, it was Swedish meatballs with lingenberry sauce ... except there's no Sweden in Warcraft, so it was changed to "vrykul." Here, the same thing happened, only instead of meatballs it's meatLOAF. I wanted to change up the "scene" a little, since I didn't imagine that meatloaf in itself would be terribly exciting, so I tried depicting a "dining hall." Not that a vrykul dining hall would have *chairs*, but I'm not sure they'd use proper utensils either. Really, I was just going for generic fantasy setting here. Scaling was a big challenge, because I wanted the plate in the foreground to be large, but at this angle it would be difficult to show the table going out that far. I ended up playing around with relative scale and the result is a bit weird, but I marked it all off as an experiment anyway. (It's not like I'm getting paid for any of this, after all.)
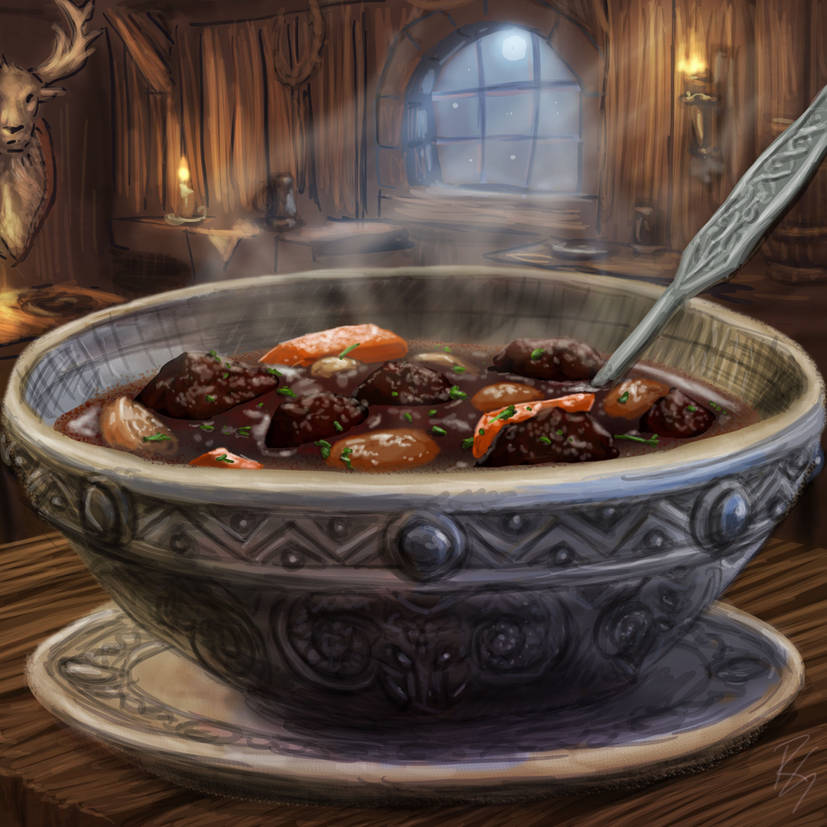
Vrykul Venison Stew
We seemed to be on something of a vrykul kick for a bit, this time with some stew. There's nothing about the way I portrayed the stew that makes it particularly VENISON, vs. any other meat, so I was inspired to have a background that looks like the inside of a hunter's shack with a stag trophy on the wall.
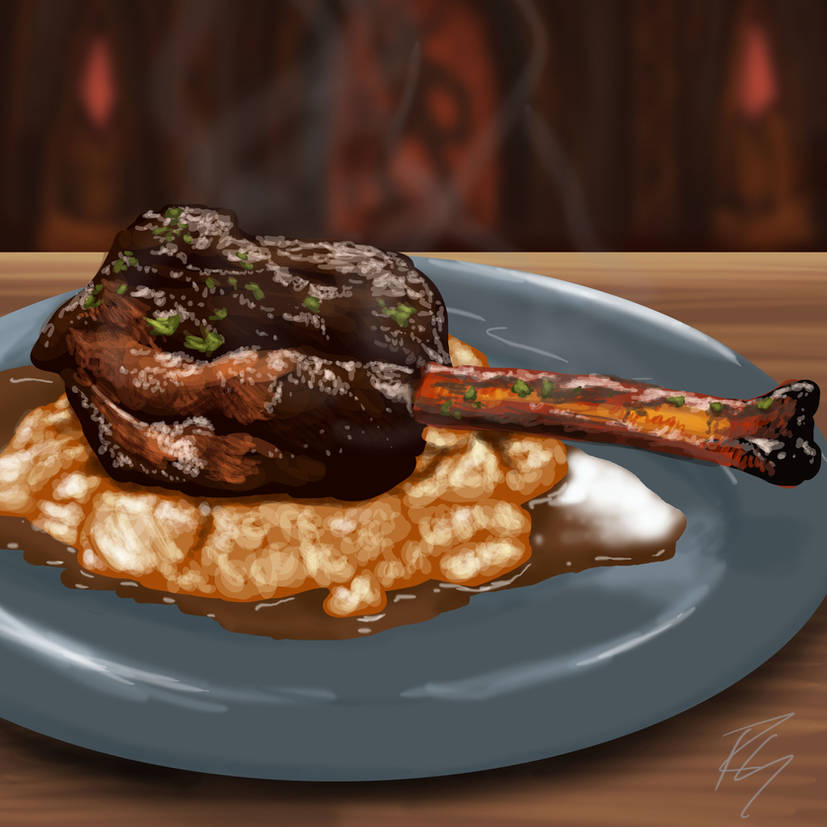
Honey-Roasted Lamb Shank
More supposedly vrykul quisine, this time a lamb shank. I put the most work into the detail on the meat and bones (I was working from photos); the biggest challenge for me was in getting the mashed potatoes and the gravy it was resting atop. I was running short on time, so I basically just recycled a backdrop from a much older "vrykul" setting picture I'd drawn and made it super-blurry. So, SOMETHING is back there, but it doesn't matter terribly much.
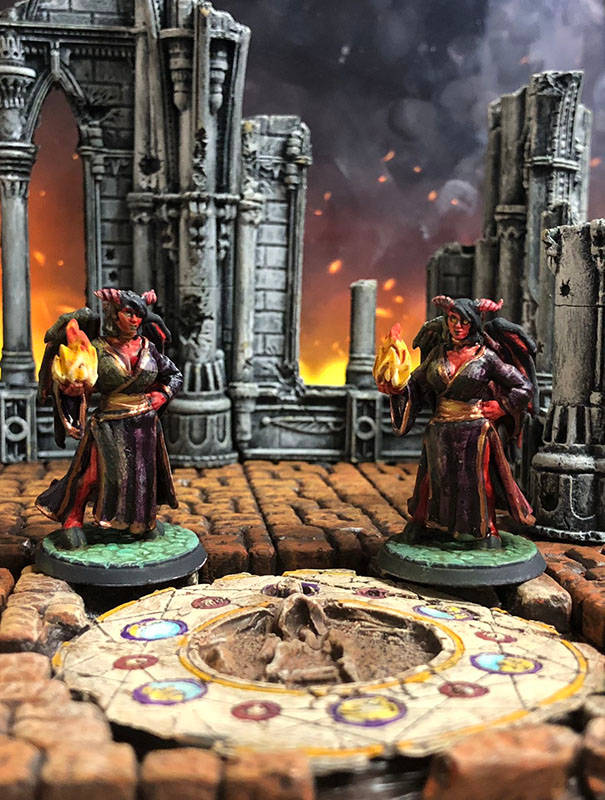
Tiefling Twins
Another big project for me this month was in painting 3D-printed minis. My friend with the 3D-printer had a bunch of custom minis he'd put together through HeroForge; he bought the STLs generated by HeroForge, and printed them himself, rather than having them print and ship the mini to him. Here, he printed off a mini of a tiefling character from one of his campaigns (he runs a lot more games than I do, alternating weekends and such), but he was having trouble with resin bits breaking off, so he printed TWO just to be sure. He actually printed a third, but it was one that broke or misprinted, so it was missing a wing and part of a sleeve, but I ended up doing some putty-work to fix it and ended up painting it up the same way (not pictured).
The scenery is a mix of old resin-cast "cathedral ruins" pieces from back in my Warzone/Mutant Chronicles days, some Hirst Arts Castlemolds hydrocal floor tile casts, and a repurposed decorative resin base that I thought made a pretty good "evil magic circle" for another floor tile.
The fiery effect in the background is my old hand-me-down iPad displaying an image. I thought I'd play around with using it for backdrops.
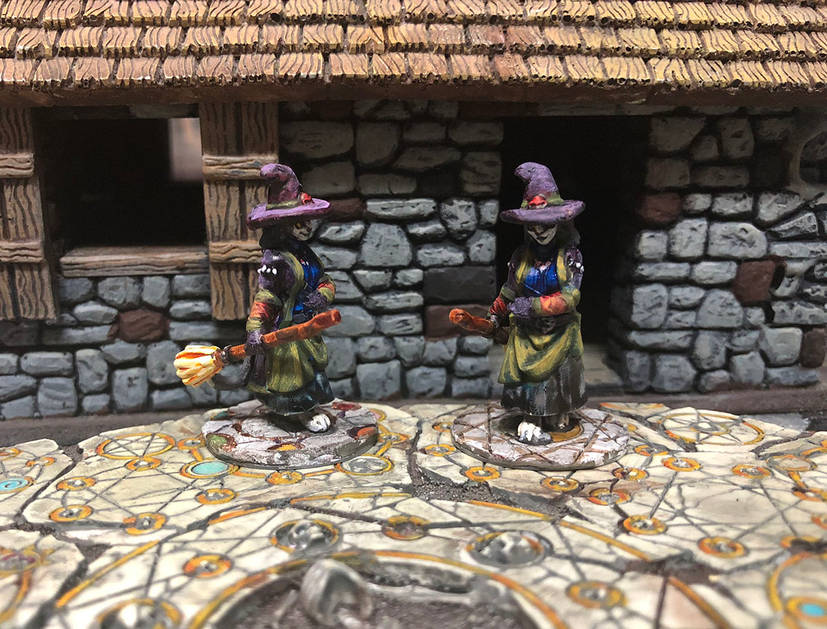
Tabaxi Witches
Another HeroForge model designed by a player for a fantasy RPG campaign. ( https://www.heroforge.com/load_config%3D17922074/ )
The original print fell on hardwood floor and shattered into a bazillion pieces, so I helped out by painting up some spares. The cottage in the background is built from Hirst Arts Castlemolds blocks.
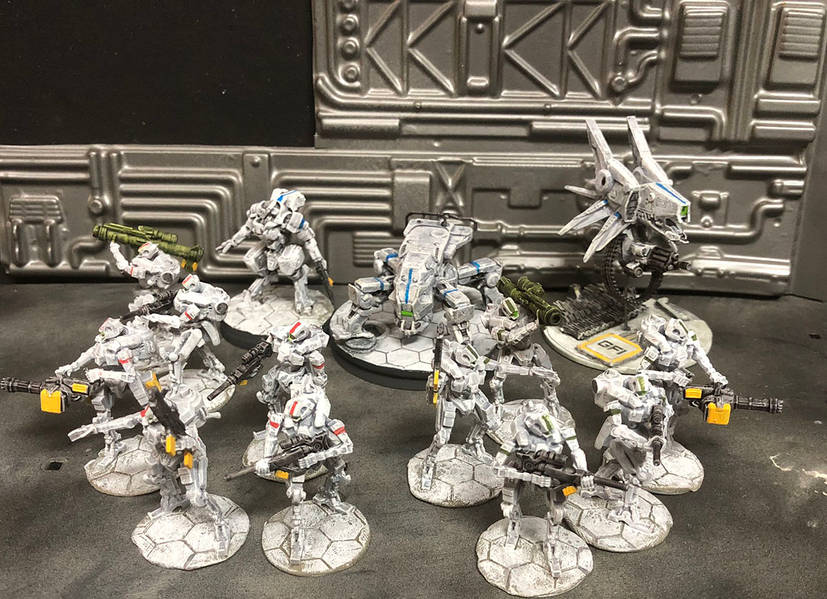
Mecha and 3D Support Ruins
One of the pieces in the "3D pile o' shame" was a semi-generic mecha-type robot piece that I assembled, based, and did some fairly rough paint-work on. With this big of a pile of minis to paint, I just tried to do quick-and-dirty "good-enough-for-the-tabletop" work rather than getting into fiddly details.
The more fun element here though is that in the process of prepping these 3D-printed models, I had to remove lots of resin supports -- or what I think of as "scaffolding." These roughly look like a couple of lines of resin, usually ending in sharp tips where they connect to the model (all the better to make them easy to break off at a thin connection point), and with zig-zag braces running between the straight lines. Their purpose is to support the figure as it's coming out of the vat, though it's the reverse of how "supports" work with filament printers.
The result is something that looks something like support beams, although fairly thin. I imagined -- hey, maybe this could be under-structure for some sort of futuristic sci-fi building? Or, in other words ... something to make RUINS out of? So, since the mecha seemed to be in an entirely different scale than the rest of the minis I was working on, I figured I could make a tiny ruined building to go with it, jamming random scraps and bits, along with sections of the supports into some putty and with a mat board base.
Anyway, back to the reason for supports: the 3D printer is basically working with a big vat of liquid that, when exposed to UV light, hardens into resin. It uses lasers (or LEDs through a screen) to pinpoint locations on the bottom surface of the liquid (through a clear layer) to solidify select points of liquid against a big metal base plate. The base plate is then slowly raised, allowing more liquid to flow in, and the lights focus on the *next* super-thin layer, solidifying it, and building as it goes. If you're building a figure that's narrow on one end, thick in the middle, and narrow on the other -- such, as, say, a sphere -- then that means that the connecting point to that base plate might be very very small, and as more of the form gets built, it gets *HEAVIER* and the base plate might not be able to hold it all. Even if it could, the individual layers of the resin might not be strong enough to maintain adhesion, and they might peel away if there's too much weight pulling down on them and too little support. That's where the supports come in -- little frameworks designed to maintain a connecting scaffolding so that every part of the model -- however wide it gets in the middle or the bottom -- will have a direct point of connection back to the base-plate, and it distributes the weight evenly to reduce the chance of peel-away.
The tricky bit is that all that support doesn't just magically go away. A tedious part of the process is that once the whole thing is formed and pulled out of the vat (and put under UV light to "cure" any lingering liquid that might be clinging to it), I need to remove all that support-stuff before I start assembling and painting. Sometimes it can be challenging with a really fine miniature to figure out what's "support" and what's not. A figure with a hood and cloak might have "supports" that just bridge points between the overhand of the cowl and, say, a half-concealed arm holding a weapon underneath, rather than going all the way back to the baseplate. I have to figure out what's a support and what's actually *supposed to be part of the miniature* so that I don't break off the wrong bits. Sometimes I don't realize that I missed a mini-support until I'm partway through painting the mini. :/
Also, since those connection points are so thin, once the connection is broken, the points are often SHARP and POKEY. I've suffered a few pin-prick accidents as a result of this. So ... supports are a pain, but they're also essential. Therefore, it's kind of nice to find an alternate use to the things. (I just made sure to snip off those sharp points. No sense stabbing myself on terrain.)
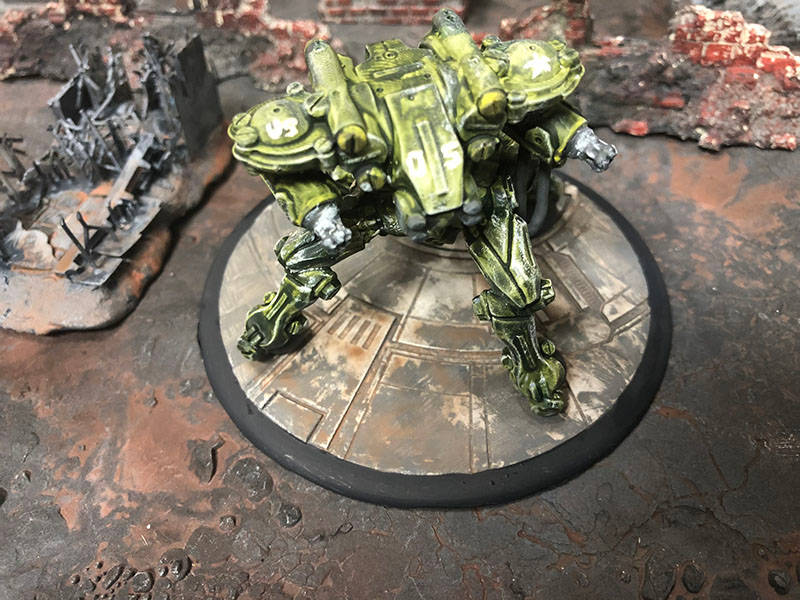
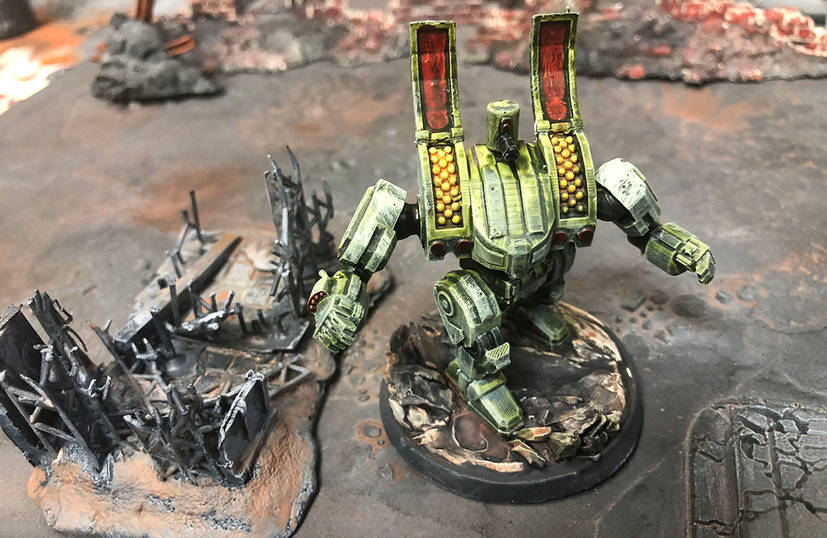
Mega-Sentrybot
Another 3D-printed giant robot. This one looked vaguely like the Sentrybot from Fallout, though with four roller-feet instead of three, and a more formidable anime-ish look (I think). I could imagine this being some sort of prototype "super-sentrybot" robot as a special encounter.
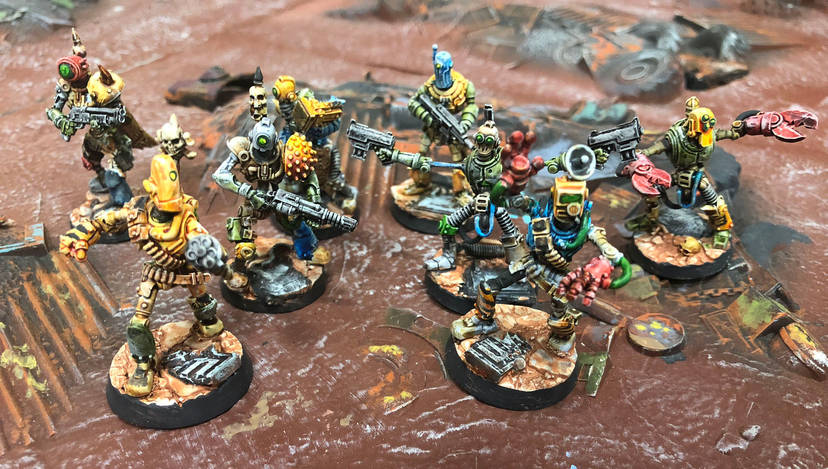
Scrapbots
These were kind of fun! Rather than being complete figures, I received some baggies of PARTS that could be put together like a construction set. Now, this had its problems, because one trouble with assembling tiny pieces for tiny miniatures is that it can be difficult to get them to stick together properly, and even once glued, it can be fairly easy to knock them apart again. Most of these were fairly well-designed with deep-socketing connection points, but in a few cases I had to use a pinning drill and do some wire-pinning for a more secure connection point.
Some of these have a retro vibe, and I could totally imagine these as "creations" of some sort of robo-tinker type like the Automatron or the Mechinator from Fallout. To try to go with the idea that these were made from salvaged parts from different sources, I went with randomly coloring different parts. I also tried to keep the rust to a minimum, since these are supposed to represent something that's been cobbled together fairly recently, not just sitting out in the Wasteland and corroding away.
This scrap-bot band is comprised of parts from the 3T-H05 and B4S3-L1N3 kits from IoL.
3T-H05:
https://www.myminifactory.com/object/3d-print-3t-h05-the-robot-modular-build-a-bot-miniature-381768
B4S3-L1N3:
https://www.myminifactory.com/object/3d-print-b4s3-l1n3-the-robot-modular-build-a-bot-329950
Cyber Enforcers
More robot minis, though these looked to be more from a cyberpunk/futuristic setting rather than "retrofuturistic." They didn't come with bases, so I tried making some. I had a paper-puncher that would do 1" diameter circles that I found at the thrift store, so I tried punching circles of pieces of plastic that came as backing sheets for some deli meats from the grocery store, and then texture-stamping some putty with a "hex-grid" texture for "futuristic" city sidewalk tiles. Another base in the background is made from a scrap MDF base with some assorted punch-out MDF bits, and some leftover supports that looked "techno"-ish to me.
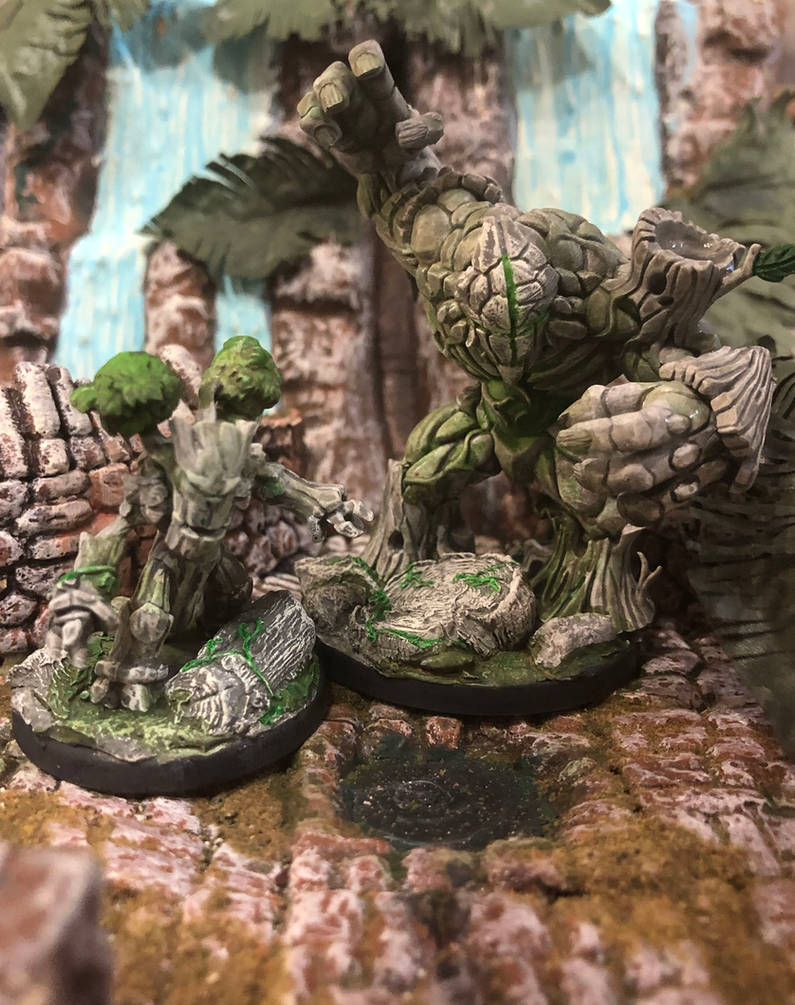
The Trees are Displeased
It wasn't all robots. There were also some treant/nature-guardian type minis that I fixed up. Again, they didn't have bases, so I improvised with some plain base templates and some epoxy putty texture-stamping and such.
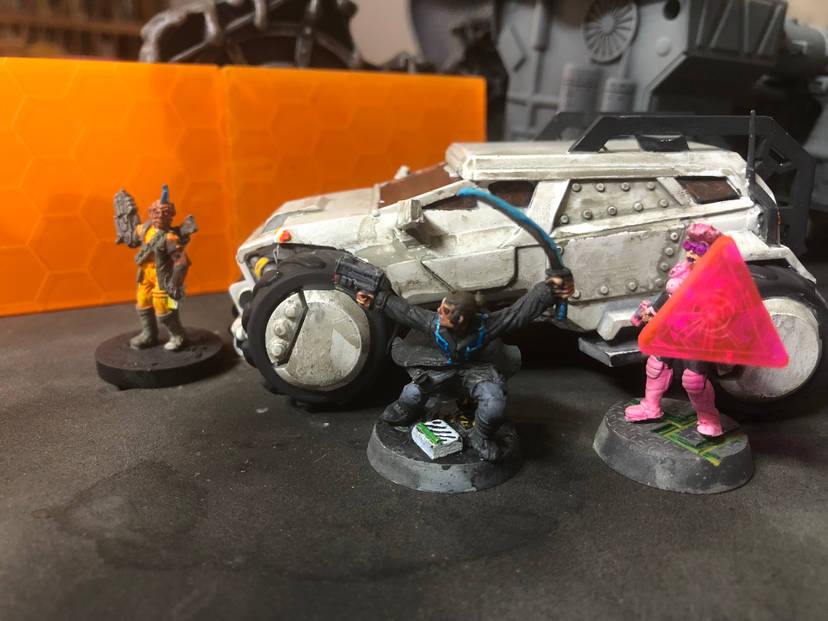
Cyber SUV
There was also a fun (and surprisingly light -- evidently HOLLOW) "off-road vehicle" in the box of stuff to paint. I gave it some basic work and some wash-grunge, and posted it with a few of my old Interface Zero Kickstarter minis I painted up from a while back. (I was given the minis as a thank-you for some hasty graphics work I did for the Kickstarter.)
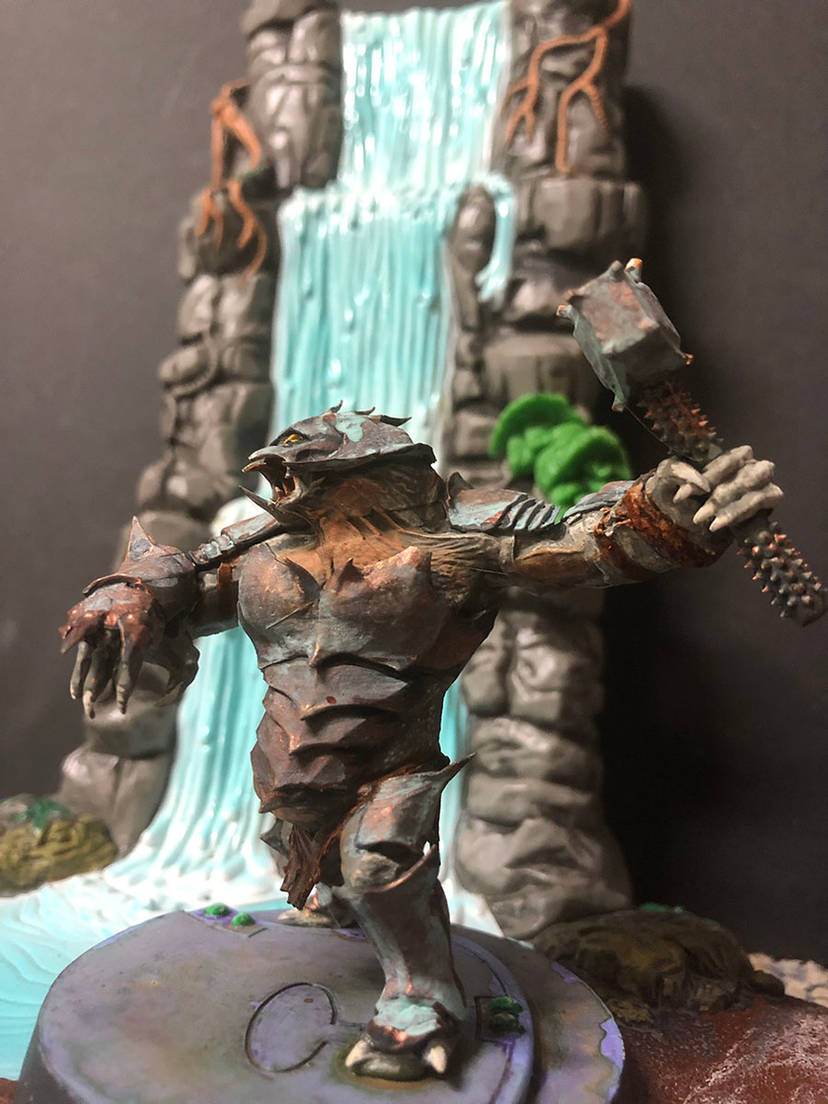
The Sea Ogre
Honestly, I have no idea what this thing is supposed to be. It's vaguely ogre-like, but has a strange Predator-like thing going with its mouth, and armor plates that make me think something of horseshoe crabs and the like. I came up with the notion of "sea ogre" and tried painting the apparent armor plates with some metallic bronze, and then gave the armor areas some wash of "verdigris" (some old "sea-foam" colored acrylic I had that had turned soupy in the container and resisted efforts to re-mix, so I just used it for "verdigris-wash" without no further thinning via water needed). The background piece is a plastic "waterfall" backdrop for a Tomb Raider mini I got on clearance ages ago. (I converted the Lara Croft mini into a Sasta action figure for Koogrr as a custom gift, but then I think I went with an Egyptian tomb type diorama base/backdrop for it instead of the cartoony plastic "waterfall.")
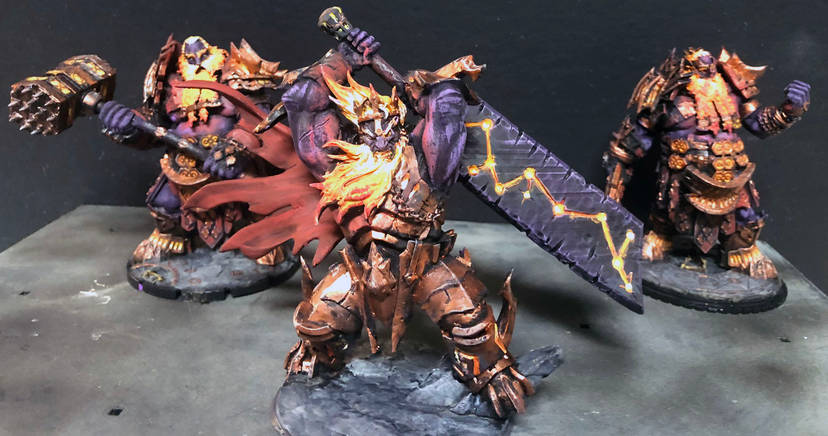
Fire Giants ... or Dark Iron Warriors
Assembling these guys was a challenge since a couple of the pieces were warped (and you can't just "straighten out" resin of this sort), a couple of pieces misprinted, and there were no bases. I improvised by splitting an old (large) HeroClix base, and finding another large-diameter disc for a third base, and doing more epoxy-putty texture-stamping, some putty touch-up work, and a bit of pinning. Depending on the scale, maybe these are Dark Iron Dwarves from World of Warcraft, or maybe they're fire giants. Either way, I wouldn't want to mess with them!

Wayside Shrine of Atom
a 3D-printed "undetonated bomb" piece decorated with some epoxy putty, spare 3D-printing supports, and assorted Games Workshop Warhammer Fantasy Battle "Flagellants" bits to make a shrine for the Children of Atom from the Fallout games. (Roughly 28-32mm scale, or somewhere in the neighborhood of 1:64 to 1:48.)
Painted up for a "Winter of Atom" Fallout 2d20 (Modiphius) RPG campaign run by my friend with the 3D printer.
...
I'm still not done with August, but from there we get into my ideas for my own Fallout-themed campaign. I'm going to make a separate post about that.
no subject
Date: 2024-12-02 07:23 am (UTC)Nice work on painting the 3D-printed minis!
no subject
Date: 2024-12-02 07:07 pm (UTC)Occasionally, yes! ^_^ That's why it's best to draw after having eaten already.
no subject
Date: 2024-12-02 11:12 pm (UTC)