[Artwork & Stuff] June 2024
Nov. 13th, 2024 01:03 pm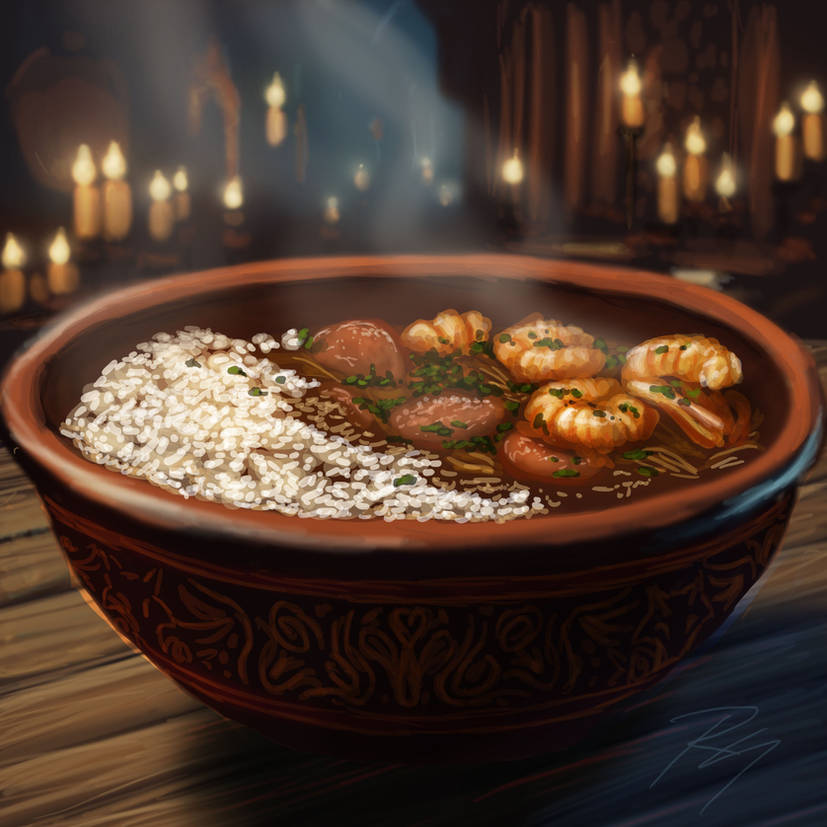
Gilnean Gumbo
Why is the gumbo Gilnean? Why not? It had to be somewhere.
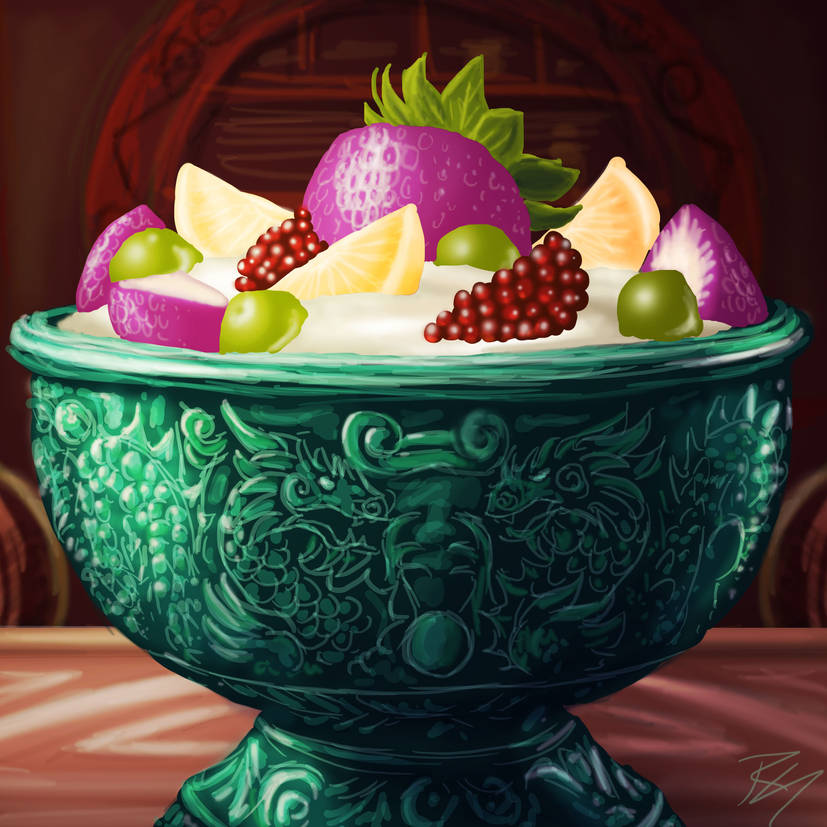
Pandaren Fruit Parfait
A fruit parfait, this time Pandaren, so I tried looking up some Warcraft fruits that might be interesting, and put it all in a jade bowl.

Draenic Sufganiyot
Actually, this was from back in December. Sorry, skipped that one. I was asked to draw something for Hannukah, but make it NOT HANNUKAH. So ... uh ... five candles on this DRAENIC candelabra! The backdrop used a Draenei "house" interior as a model.
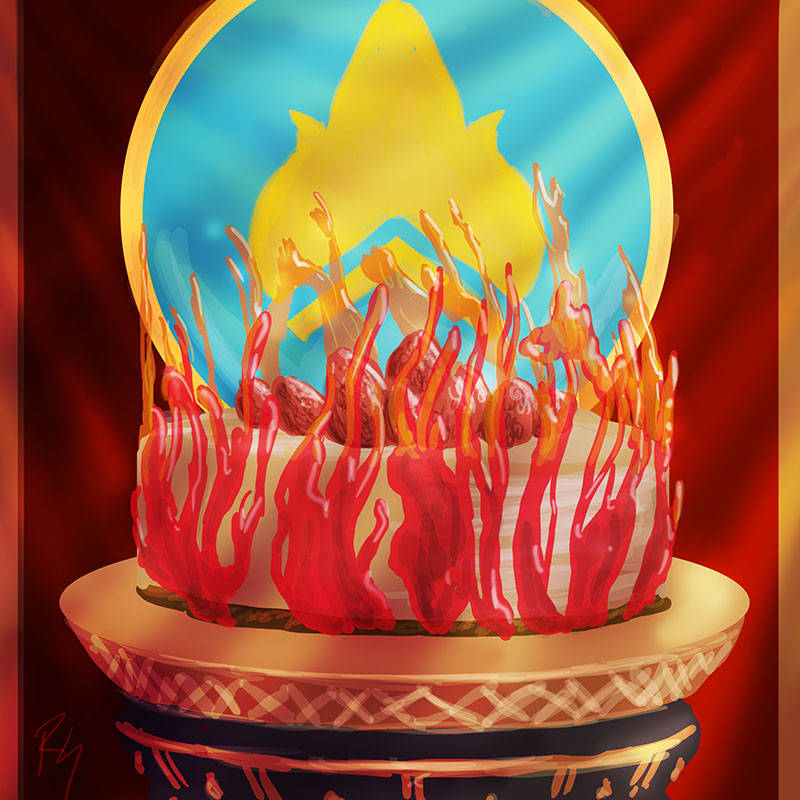
Midsummer Fire Festival Cake
Color sketch of a cake made for the Midsummer Fire Festival (design based on a photograph shown to me of a strawberry-topped cake with translucent sugar "flames" running around the perimeter), on a pedestal patterned after the Fire Festival Brazier. The emblem in the background is that of the festival as displayed on various banners that pop up in World of Warcraft during the extended "holiday."
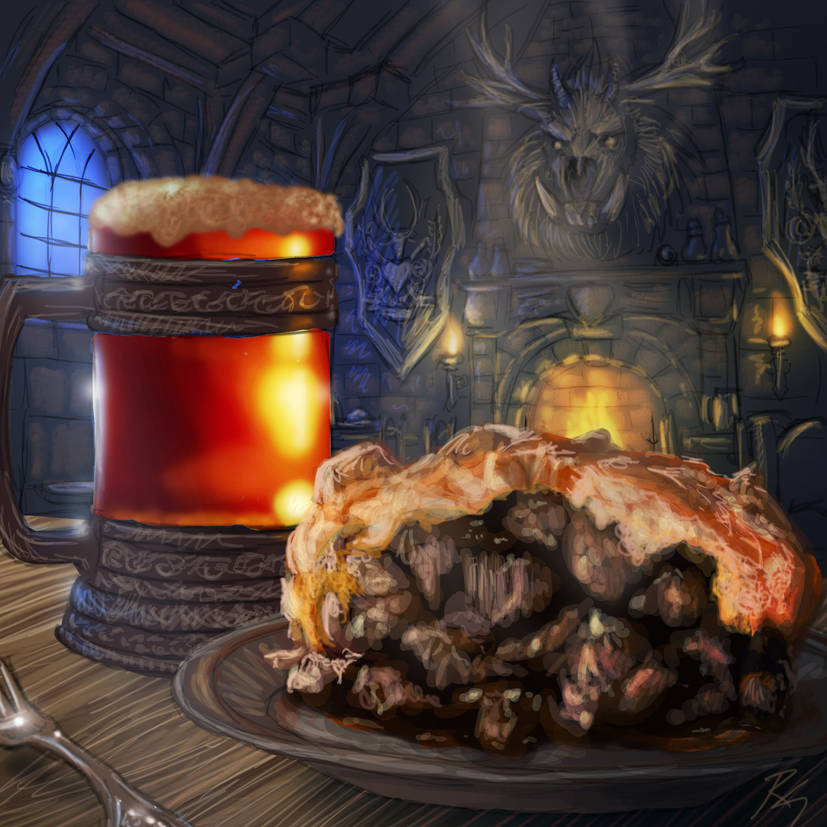
Gilnean Steak and Ale
A meat-pie served with some ale in a Gilnean tavern with some sort of I-have-no-idea-WHAT-that-thing-is beast trophy mounted on the wall. (I was just sort of making it up as I went; I figure there's got to be room for more strange chimeric creatures lurking in the woods of Gilneas after everything the Forsaken did to the place.)

Stormwind Gatehouse at Redridge Mountains
Color sketch of an Alliance gatehouse somewhere in the Redridge Mountains in autumn. I was asked to come up with some illustrations of some different RP regions for the newspaper, as actual in-game shots of such locations make them look a lot more sparse (e.g., maybe a cottage or two in the shot and that's it for a "village").
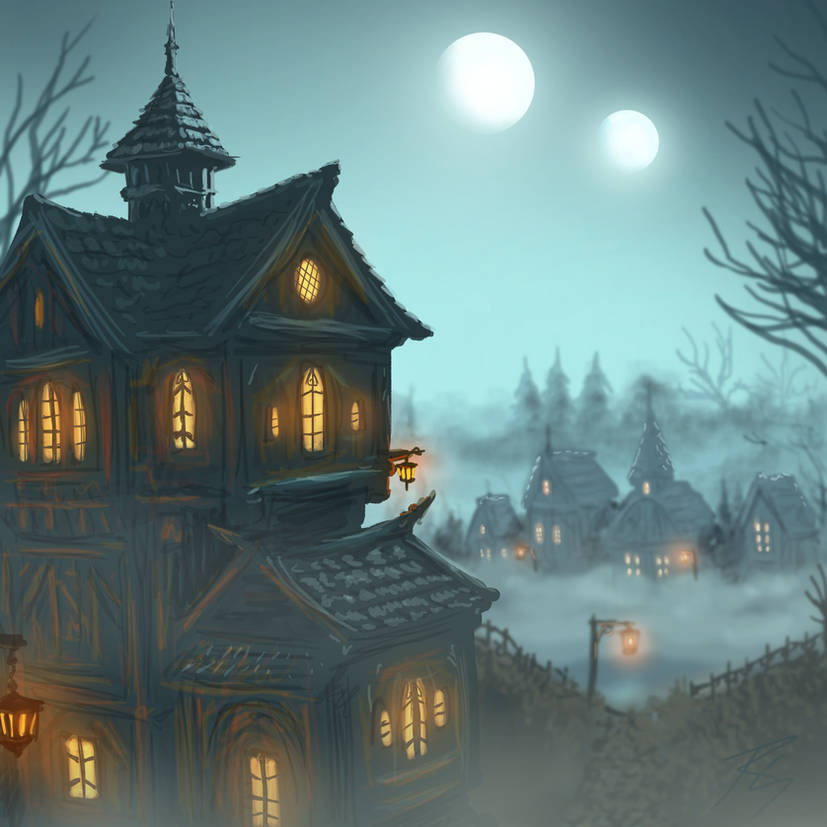
Foggy Night at Raven Hill
Color sketch of the "city" at Raven Hill, with the (canon) two moons in the sky. (It mildly bugs me how much progress they've made on the skyboxes in World of Warcraft, but the sun still rises AND sets to the west, and there's no indication of the two moons - one white, one blue - traversing the sky.)
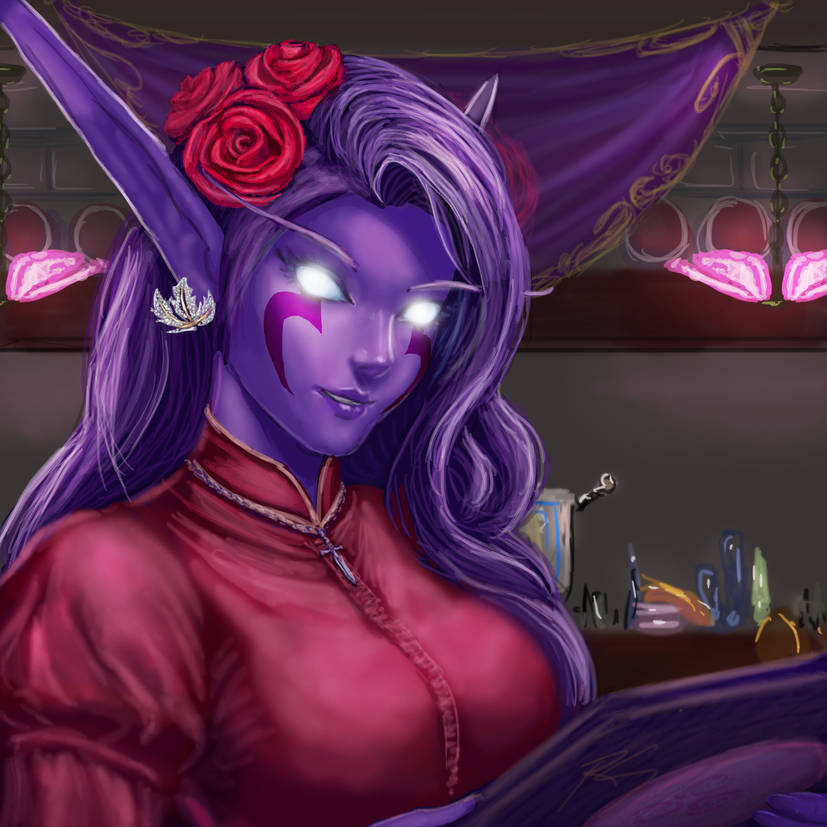
Another Nelf Waitress
Just another player's alt portrait. "A Hero's Welcome" is used as a model for the backdrop.
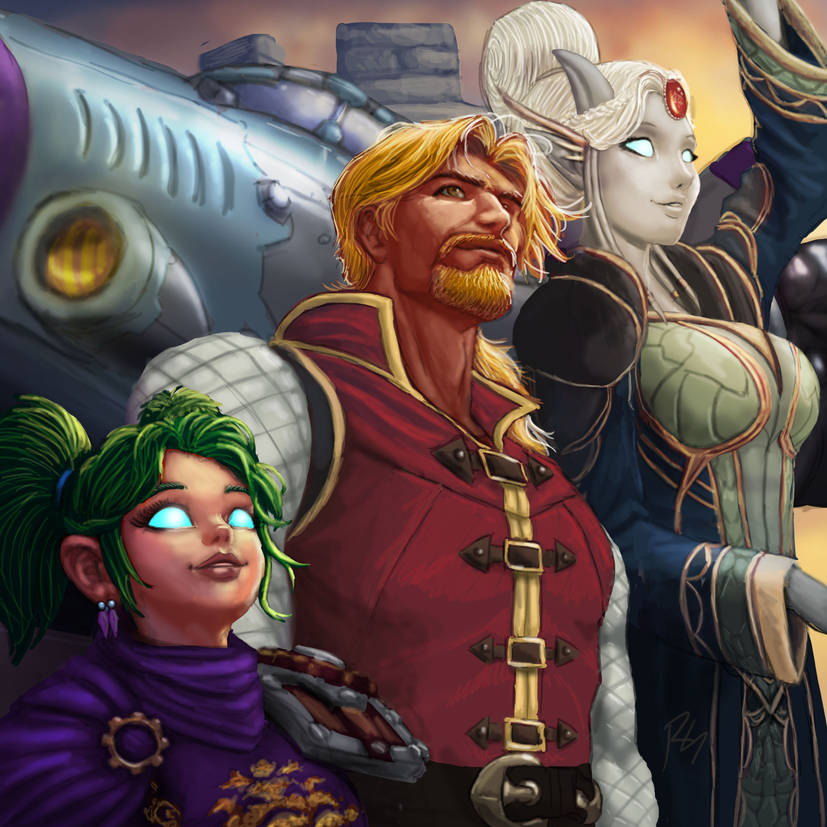
Embarking on an Air Journey
A gnomish air expedition (with human and draenei passengers) about to embark from an airfield.
(Dragons and gryphons are all well and good, but Warcraft has its airplanes as well. Just that the way the game plays with flying mount passengers, I'd be half afraid that every time we cross a zone border, there's a chance that as a passenger I'll randomly be ejected from the plane and find myself drifting helplessly down via parachute into a swarm of monsters.)
This was a challenging picture since it's a portrait of three characters. I had to do so many revisions to get their relative sizes just RIGHT. I also had to make lots of particular adjustments to the female draenei's proportions (which were too modest at first), etc., etc. I actually drew more of the figure, including the waving hand, but after all the relative size adjustments, short of reducing the gnome to just being the top of her head showing up in the corner, I had little choice but to cut that off. (Here and I thought putting the tallest character in the background would help....)
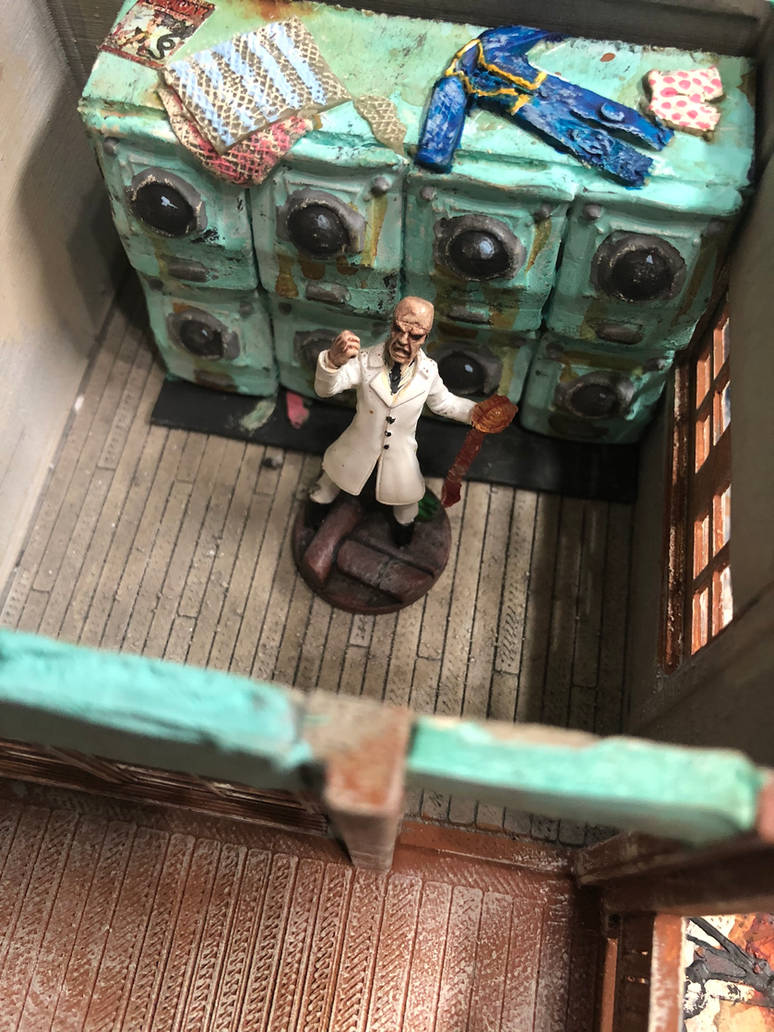
Post-Apocalyptic Coin-Op Laundry
"Mwahahahahahaa! With this laundromat, a bucket of change, and a lifetime supply of Abraxo, I shall be the champion of all things SCIENCE, thanks to my monopoly on pristine white lab coats in the Apocalypse!"
Or something like that. I just made a bank of washers/dryers (it's the retrofuture, so I'll pretend each unit can do both) to decorate one of the M3Studios "Small House" printed models from the Foggy Island STL Kickstarter. I used some putty to make the random articles of laundry thrown atop the machines, and used the handle of my hobby knife as a texture-roller for a couple of putty "towels."
The "Small House" is just a one-room thing, which is probably fine for minis gaming if you can't see the interior ("theme park scale"), but since the interior was accessible, I felt like I had to furnish it ... but having a one-room house in a futuristic setting (even a retro-futuristic one) seems a bit odd. I imagine this being a "laundry room" cabin at some sort of roadside motel or campground, with coin-operated machines, and a coin-op wall dispenser selling packets of Abraxo and fabric softener. (I actually have a piece that might work for that, but I was thinking of putting it on a stand, once I craft one, rather than permanently affixing it to the wall.)
The miniature is an old HorrorClix "Braineater" mini from "The Lab" set, only I modified him as I thought having an *exposed brain* was a bit off-theme. (Now, give him a clear dome on his skull that inexplicably allows one to SEE his brain inside, and that might be just about right.)
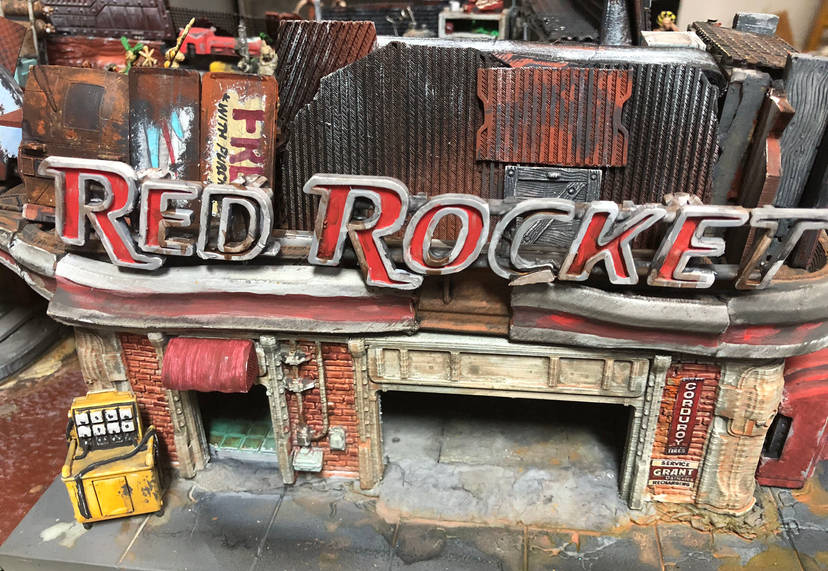
Red Rocket Outpost
A Red Rocket quick-service station converted into a scavenger outpost, long after the bombs dropped, with a scrap-barricade fort built atop the original roof.
This was a 3D model from Modiphius, with the bulk of the building printed with relatively low-resolution FDM at 80% the default model size, hence at something around 1:64 scale; the "Red Rocket" signage itself was resin-printed at a higher resolution. The roof is in removable segments, and the signage nestles into slots, so it can be easily disassembled. The wall segments can be removed as well, slotting into gaps in the flooring base for easy access to the interior for miniatures gaming.
I used a couple of Secret Weapon Miniatures "Tablescapes" 12"x12" tiles for a foundation, so I could easily disassemble the whole thing for storage/transport. The barricades atop the roof are built primarily with "rafts" leftover from 3D-printing and an assortment of spare plastic dividers from craft organizer cases, along with whatever other "bits" were available. Various props such as the shop diagnostic machine, the Nuka-Cola machine around the corner, and some of the workshop stations peeking over the top are Modiphius resin kits from Fallout: Wasteland Warfare.
It was a lot of fun putting this thing together, and it was HUGE, and yet, at 80% scale I still couldn't fit a car into the service garage, and I'm still perplexed at the idea of having a service station where there are no bathrooms. Like, even if they're not publicly accessible, what about who works there?
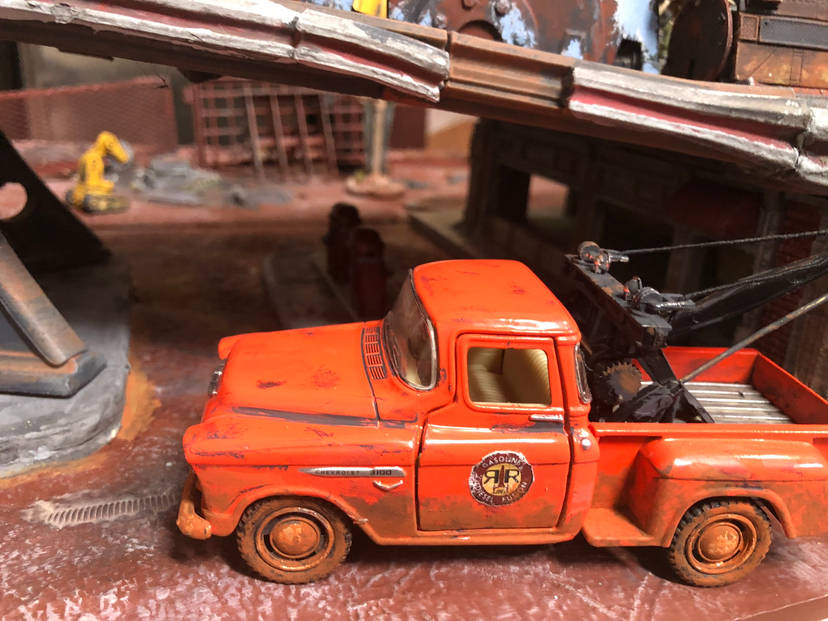
Red Rocket Service Station / Scrapper-Scavenger Truck
An old pre-war electric Red Rocket tow truck has been refurbished and pressed into service by some scavengers based at the local Red Rocket station, ready to haul roadside wrecks back to the shop. That way, the "chopper-bot" (vaguely visible as a yellowish blob on tracks in the background) can get to work disassembling them for scrap, heedless of any radiation hazard posed by the unstable fusion engines.
This was a 1:43 scale toy truck I found at the historic Wagon Wheel Motel gift shop alongside Route 66 in Cuba, Missouri some years ago. My travels had taken me past the site a few times, but always when the gift shop was closed -- but finally I managed to stop in just before it was about to shut for the day. I wanted to find some sort of souvenir, and I spotted a really sad-looking box of toy trucks that had seen better days. A toy tow truck had broken and missing plastic pieces, but I figured that I could make use of it with all my post-apoc terrain-building. Much later, I finally got around to rebuilding the tow frame with some pinning via some paperclip wire. I might add a few more techno-greebles further down the line, but this, plus some stippled-on paint to add some "grunge," and a couple of Red Rocket logos on the doors at least gets the idea across.
Tags:
no subject
Date: 2024-11-13 11:50 pm (UTC)no subject
Date: 2024-11-15 04:25 pm (UTC)This sort of resin, alas, isn't the sort of material I can "straighten out" by heating it up and bending back. Although the warping was relatively minor -- I wouldn't even notice it just by looking at the pieces -- it was evident when I'd try to fit the pieces together. The rooftop came in several parts that had to be linked together, and in order to make it work properly, I had to do a lot of filing/sanding and gap-filling with putty, and reinforcement with other pieces underneath. There was a lot of "ARGH!" but once I got through all that, and was able to fit the whole thing together, it was actually kind of fun to go through the process of decorating it and so forth.
If the model HAD been printed at 100% scale, then the pieces would presumably be heavier and there would have been a lot more failing in prints -- plus, it would cost a whole lot more in resin, take up more of a "footprint" for a base, etc., etc. So as much as I would love to see and work with the full-sized model, I can see why the choice was made to scale it down a bit.
Even at 80% scale, it covers about a 2'x1' area on the table. I also have a few extra wall sections (results of minor mis-prints) that he gave me to find something to do with; I haven't yet settled on exactly what I'm going to do, but I was toying with the idea of either making some sort of an accompanying outbuilding in a similar style, or else making a "ruined" Red Rocket mostly reduced to rubble, but with a few standing wall segments.
no subject
Date: 2024-11-27 06:54 pm (UTC)Your "doodles" are amazing. The gumbo looks like a photo. o_o Love the lighting and details on the bowls! The portraits are especially gorgeous, too.
no subject
Date: 2024-11-27 09:00 pm (UTC)I recently had a couple of people say, "Oh, I thought it was AI art!" Which ... I guess is a compliment? Maybe. I look at visual references for things, and in a sense all I'm doing is collaging together elements from different pictures and trying to make it fit, so I guess in a way I'm just doing what AI is doing, but sloppier and slower. It tells me that folks are only looking at the thumbnails without zooming in, though, because if they did, they'd see the scribbly construction lines, my messy scratchy painting and so forth and other things that even an AI wouldn't likely mess up on. XD But I tell myself, I'm trying to do like old comics and draw large for something intended to be shrunk down and to look nice as a small filler piece. (But also, if I spent all that time cleaning things up, the payoff for time spent drops pretty significantly once I get past the initial sketch. And I'm not getting PAID, so ....)
no subject
Date: 2024-11-28 01:20 am (UTC)I am so glad you are persisting with art in the face of the AI onslaught. :/ And that your company still hires concept artists! Your food pictures are mouth-watering; good progress on that!
no subject
Date: 2024-11-27 09:57 pm (UTC)"Screen" basically takes whatever is on the layer and says, "Whatever is in this pixel, ADD it to the brightness of whatever is underneath." So, a black pixel does absolutely nothing, a white pixel just goes to white, a dark pixel will only *slightly* increase the brightness of whatever was underneath it, and so forth. It's a nice basic way to add sparkle/light effects, because whatever I add will only add "light" and not make anything darker.
"Multiply" goes the opposite direction. I combines the "darkness" of the multiply layer with whatever is underneath. In its simplest form, if I want to "color in" a black-and-white drawing, adding a "multiply" layer on top in order to add color is kind of like IRL using colored markers to fill in a black-and-white drawing. The light/white areas will get color, and the black lines will stay black. It's also useful for taking a pencil sketch scan and putting it over a "paper texture." Grey "pencil lines" will still be visible as such, but the texture will still show through, as darker areas will be darker.
"Overlay" is a little more complicated for me to try to explain. If you paint in white in an overlay layer over an image, it will tend to make midtones noticeably brighter, whereas deep shadows will be less impacted ... but also already-bright areas haven't much of anywhere to go. It doesn't just push everything to WHITE, though; rather, it will push things toward a brighter version of whatever color it already is. If it's dark red, then adding white overlay will make it a more saturated, brighter red, but won't push it to PINK let alone WHITE. Same for blue or green or whatever. It's the closest I've found to a quick and easy way for me to add a semblance of a light source to a flat image: I add an "overlay" layer, then use the "airbrush" to "spray" some low-opacity white (or yellow-white or blue-white, depending on whether I want "warm" or "cool" light) onto areas that should be illuminated. To enhance SHADOWS, I might spray with black, or a dark purple or dark blue ... or, depending on the effect I want, maybe a dark brown near the edges of the "paper."
So, white/light colors on Overlay tend to make what's underneath more intense and bright. Black/dark colors on Overlay tend to make what's underneath more shadowy. Absolute mid-tone grey does *absolutely nothing* to whatever is underneath.
For this same dynamic, an Overlay layer is a quick-and-easy to quickly "texture" an image with a bump-map, to give an illusion of topography to a map, for instance, or to make a picture look as if it's been painted onto a brick or stucco wall.
no subject
Date: 2024-11-28 01:18 am (UTC)I've never used Photoshop so the photoshop filters are especially mysterious to me. I think some other paint programs I've tried use similar names, tho, so I really appreciate the tips on what they do!
I noticed the light outlines on sides facing the light! And especially the changes from medium-shadow-thin bright line, like on the night elf's cheek and jaw -- very effective!